Lab 09: Introduction to Project 3 (Optional)
Introduction
This lab will help you with Project 3: Build Your Own World (BYOW). In this lab, you’ll learn how to use graphical user interface libraries to render your world and collect input from the user.
In the first part of this lab, you’ll learn how to use “tiles” to generate shapes on your screen. This will apply to building the rooms, hallways, and other features of your world in Project 3. In the second part, you’ll add interactivity, drawing boxes in response to key presses.
Optional
Please note that this lab is optional but highly recommended to help you complete the project! The unofficial due date is 4/4 to keep you on track, however feel free to use more time to complete the lab as needed. As follows, the lab is worth 0 points and there will be no lab sections for this week.
Note that there are some parts labeled below as “Optional”. These are additional implementations you can attempt to further test your understanding.
Pre-Lab
Some steps to complete before getting started on this lab:
- As usual, run
git pull skeleton main - Understand that project 3 will be a marathon and not a sprint. Don’t wait until the last minute. You and your partner should start thinking about your design NOW.
- Optional: Watch a previous semester’s project 3 getting started video at this link. The names and API may have changed slightly, but the bigger picture still applies.
- Optional: Read over Phase 1/skim over the project 3 spec and understand the main ideas. Spec may not yet be available when you start this lab.
This lab will give you a chance to learn about and practice many of the subtle and tricky parts of project 3, but in the context of a much simpler problem.
Part I: Meet the Tile Rendering Engine
Boring World
Open up the skeleton and check out the BoringWorldDemo file in the demo folder. Try running
it and you should see a window appear that looks like the following:
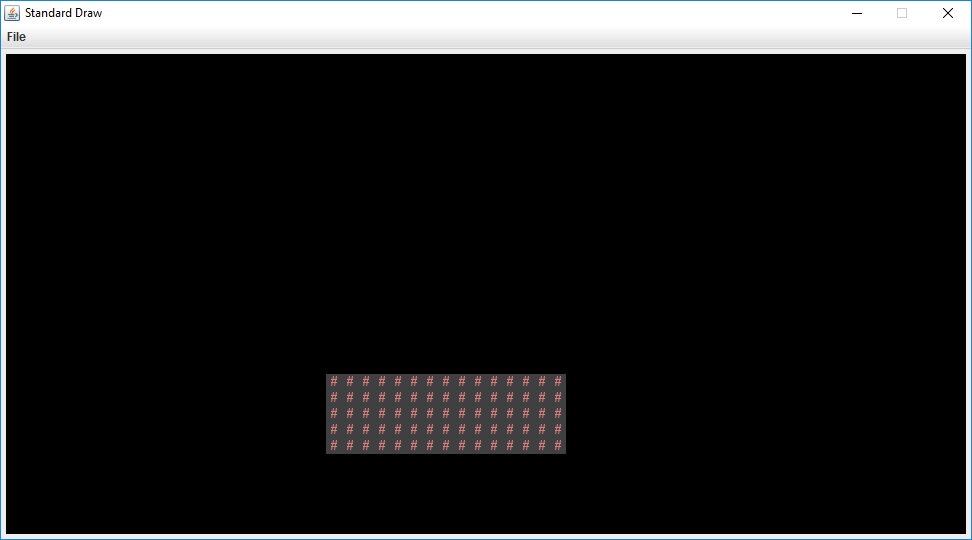
This world consists of empty space, except for the rectangular block near the bottom middle. The code to generate this world consists of three main parts:
- Initializing the tile rendering engine.
- Generating a two dimensional
TETile[][]array. - Using the tile rendering engine to display the
TETile[][]array.
Read through the code to see an example of how the tile rendering API works. After creating a TERenderer
object, you need to call the initialize method, specifying the width
and height of your world, where the width and height are given in terms of the
number of tiles. Each tile is 16 pixels by 16 pixels, so for example, if we
called ter.initialize(10, 20), we’d end up with a world that is 10 tiles wide
and 20 tiles tall, or equivalently 160 pixels wide and 320 pixels tall.
The code also demonstrates how to work with TETile objects. You can either build them from scratch
using the TETile constructor (see TETile.java), or you can choose from a
palette of pregenerated tiles in the file Tileset.java. For example, the code
from BoringWorldDemo.java below generates a 2D array of tiles and fills them
with the pregenerated tile given by Tileset.NOTHING.
TETile[][] world = new TETile[WIDTH][HEIGHT];
for (int x = 0; x < WIDTH; x++) {
    for (int y = 0; y < HEIGHT; y++) {
        world[x][y] = Tileset.NOTHING;
    }
}
Of course, we can overwrite existing tiles. For example, the code below from
BoringWorld.java creates a 15 x 5 tile region made up of the pregenerated tile
Tileset.WALL and writes it over some of the NOTHING tiles created by the
loop code shown immediately above.
for (int x = 20; x < 35; x++) {
    for (int y = 5; y < 10; y++) {
        world[x][y] = Tileset.WALL;
    }
}
(0, 0) is the bottom-left corner of the world (not the top-left as you may be used to). For example, for position (5, 4), we would go 5 units to the right and then 4 units up. We will work with this orientation in the lab.
The last step in rendering is to call ter.renderFrame(world), where
ter is a TERenderer object. Changes made to the tiles array will not appear
on the screen until you call the renderFrame method.
Try changing the tile specified to something else in the Tileset class other
than WALL and see what happens (like Tileset.GRASS or Tileset.WATER).
Also, try experimenting with changing the constants in the loop and see
how the world changes.
Tiles themselves are immutable! You cannot do something like
world[x][y].character = 'X'. Look at TETile to help understand!
Why do we initialize the world to Tileset.NOTHING, rather than just leaving it
untouched? The reason is that the renderFrame method cannot handle any tiles that are null. If you don’t initialize the world to Tileset.NOTHING, you’ll
get a NullPointerException when you try to call renderFrame.
Task 1: Tree World
Open Task1.java in the Lab9 folder. Complete the following:
- Fill in the
fillWithTrees(TETile[][] world)function, which should fill the entire 2D tile array with trees. - Fill in the
mainmethod so that it:- Creates and initializes a
TERendererof width 30 and height 20. - Creates a 2D TETile array of width 30 and height 15, i.e.
TETile[][] world = new TETile[30][15] - Calls
fillWithTrees - Calls
ter.renderFrame(world);
- Creates and initializes a
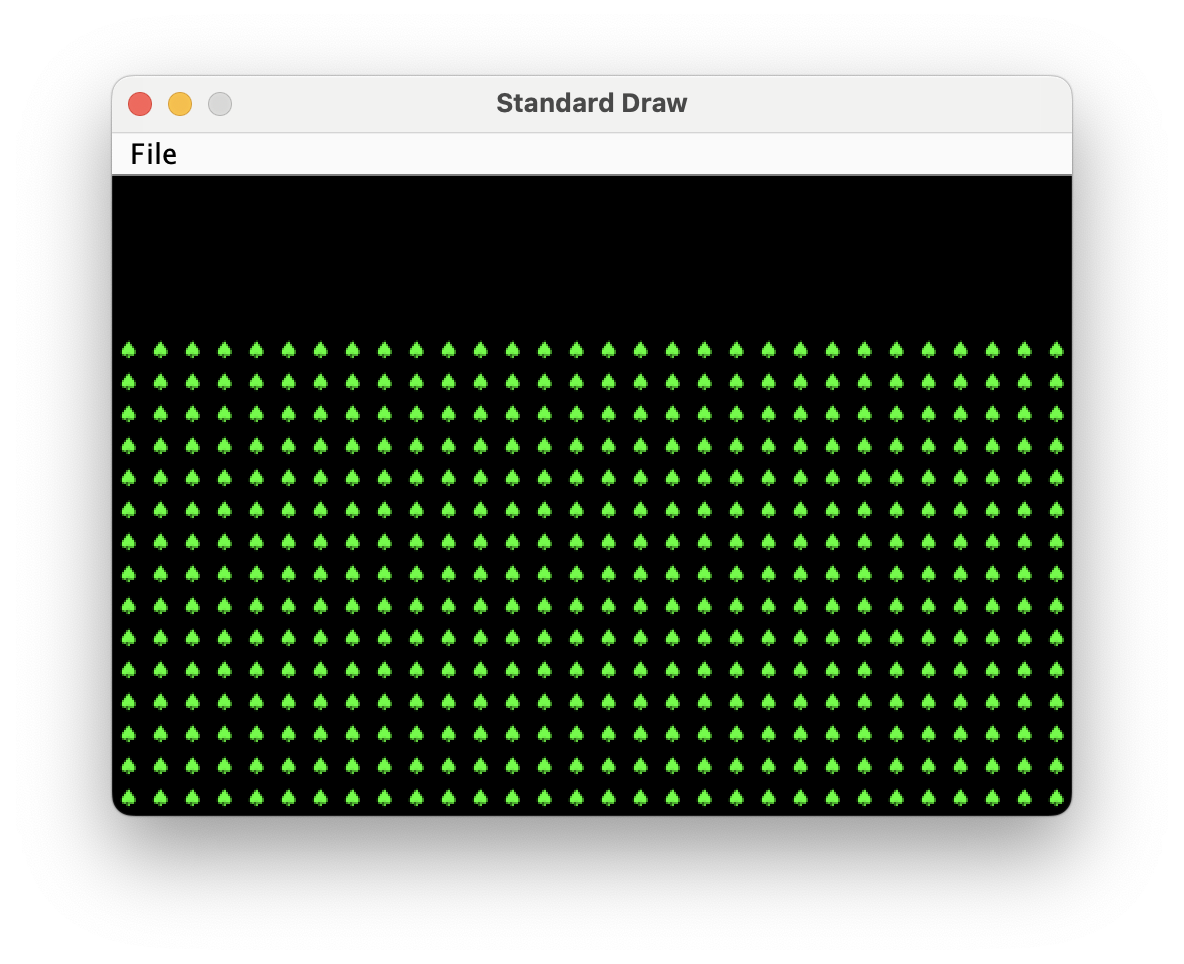
Run the program and verify that you get an image like the one shown below. Note that because the TETile[][] array is height 15 and the world is height 20, 5 empty rows are left blank. We’ll use that empty space in task 3.
Note that it’s best practice to use constants instead of having numbers hard coded into your declarations, e.g.
private static final int WORLD_HEIGHT = 15;, and new TETile[WORLD_WIDTH][WORLD_HEIGHT];. This is because
you might want to use these constants in other places, and you don’t want to accidentally change it in one place
but not another. For this reason, the style checker will yell at you if you later submit code for project 3 that
looks like TETile[][] world = new TETile[30][15]. For this lab, there’s nothing to submit, so you don’t
need to worry about this if you don’t want to.
Random World
Now open up RandomWorldDemo.java. Try running it and you should see something like this:
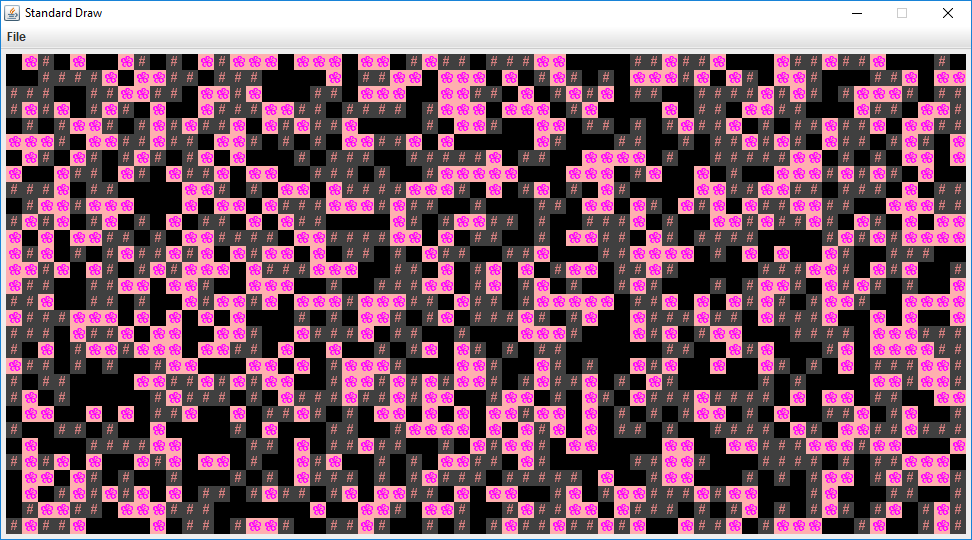
This world is sheer chaos – walls and flowers everywhere! If you look at the RandomWorldDemo.java file, you’ll
see that we’re doing a few new things:
- We create and use an object of type
Randomthat is a “pseudorandom number generator”. - We use a new type of conditional called a
switchstatement. - We have delegated work to functions instead of doing everything in
main.
A random number generator does exactly what its name suggests, it produces an
infinite stream of numbers that appear to be randomly ordered. The Random
class provides the ability to produce pseudorandom numbers for us in Java.
For example, the following code generates and prints 3 random integers:
Random r = new Random(1000);
System.out.println(r.nextInt());
System.out.println(r.nextInt());
System.out.println(r.nextInt());
We call Random a pseudorandom number generator because it isn’t truly
random. Underneath the hood, it uses cool math to take the previously generated
number and calculate the next number. We won’t go into the details of this math,
but see Wikipedia
if you’re curious. More importantly, the sequence generated is deterministic, and the
way we get different sequences is by choosing what is called a “seed”. This pseudorandomness will be a core part of Project 3.
In the above code snippet, the seed is the input to the Random constructor, so
1000 in this case. Having control over the seed is pretty useful since it
allows us to indirectly control the output of the random number generator. If we
provide the same seed to the constructor, we will get the same sequence values.
For example, the code below prints 4 random numbers, then prints the SAME 4
random numbers again. Since the seed is different from the previous code
snippet, the 4 numbers will likely be different from the 3 numbers printed
above. This will be super helpful in Project 3, as it will give us deterministic
randomness: your worlds look totally random, but you can recreate them
consistently for debugging (and grading) purposes.
Random r = new Random(82731);
System.out.println(r.nextInt());
System.out.println(r.nextInt());
System.out.println(r.nextInt());
System.out.println(r.nextInt());
r = new Random(82731);
System.out.println(r.nextInt());
System.out.println(r.nextInt());
System.out.println(r.nextInt());
System.out.println(r.nextInt());
In the case a seed is not provided by the user/programmer, i.e.
Random r = new Random(), random number generators select a seed using some
value that changes frequently and produces a lot of unique values, such as the
current time and date. Seeds can be generated in all sorts of other stranger
ways, such as
using a wall full of lava lamps.
For now, RandomWorldDemo uses a hard coded seed, namely 2873123, so it will
always generate the exact same random world. You can change the seed if you want
to see other random worlds, though given how chaotic the world is, it probably
won’t be very interesting.
The final and most important thing is that rather than doing everything in
main, our code delegates work to functions with clearly defined behavior.
This is critically important for your project 3 experience! You’re going to want
to constantly identify small subtasks that can be solved with clearly defined
methods. Furthermore, your methods should form a hierarchy of abstractions!
At this point, please ensure that you’ve read through and understood BoringWorldDemo
and RandomWorldDemo (important!) and that you understand roughly how to work with
TERenderer, TETile, and Tileset. It’ll be expected for the next parts that you
have a rough idea of how the first two demo classes work and how to work with the tile
rendering classes.
Task 2A: A square of flowers.
Copy Task1.java to create Task2.java. Complete the following:
- Write a function
private static void drawSquare(TETile[][] world, int startX, int startY, int size, TETile tile). This function should fill in a square of the given side length made of the given tile. Its top left corner should be at positionstartXandstartY. If the square goes out of bounds, skip any out of bounds tiles, i.e. your function shouldn’t crash due to an out of bounds error. - Modify main so that it calls
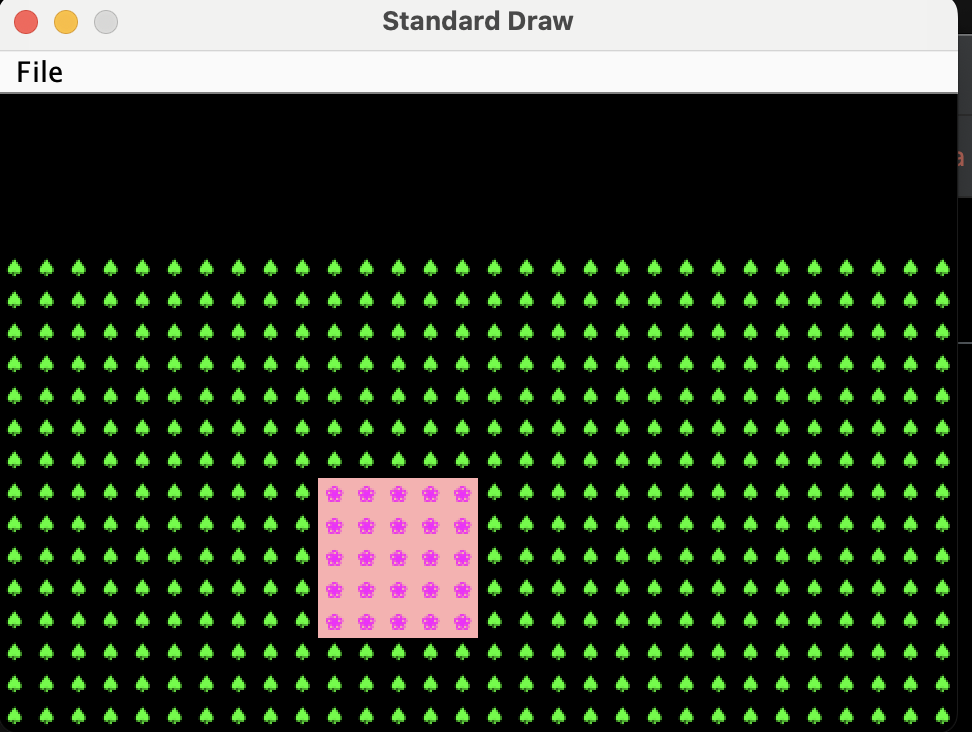
drawSquare(world, 10, 7, 5, Tileset.FLOWER);after the call tofillWithTrees. Note, you may need to changeworldto match the variable name that you chose.
Running your program, you should see the following.
Task 2B: Random square locations
In Task2.java, complete the following:
- Write a function
private static void addRandomSquare(TETile[][] world, Random rand)that usesdrawSquareto draw a square of flowers of random size between 3 and 7 at a random X and random Y coordinate. It’s OK if the square isn’t entirely within bounds, though the top left corner should be in bounds. - Modify your
mainfunction so that it callsaddRandomSquareinstead of the hard codeddrawSquareabove. You should use a hard coded random seed.
Note: If you want random number between 3 and 7, you can use RandomUtils.uniform(rand, 3, 8); This function call returns a random integer value in the range [3, 8), i.e. is exclusive of the right end of the range.
Try running your program with different random seeds and you should see different squares get drawn. And if you pick the same random seed, you should see the same square get drawn.
Task 2C: Random square type
Modify your Task2.java code so that the square that gets drawn is either FLOWER, WALL, or WATER, with equal probability. Use a switch statement, following the example in the demo code.
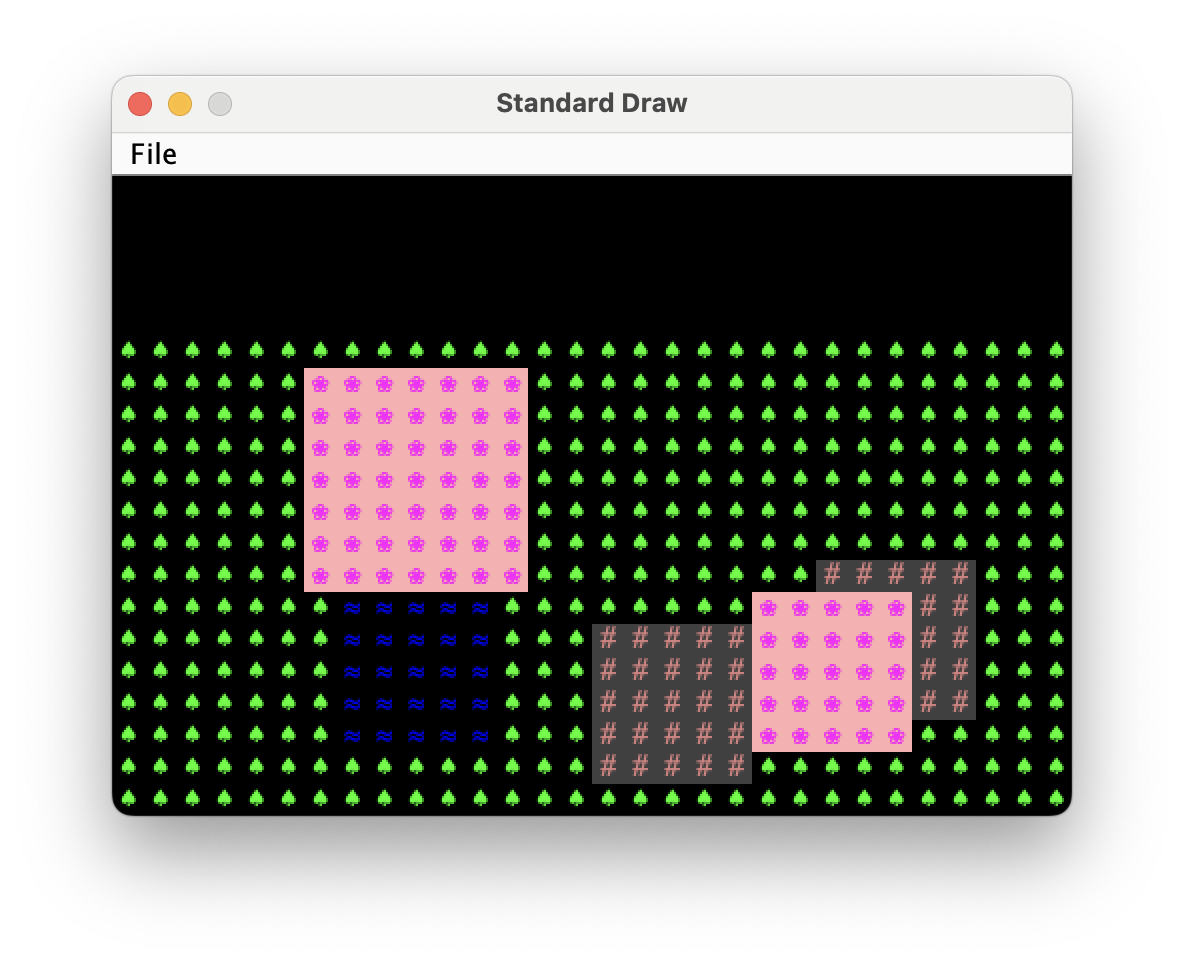
Task 2D: 5 Squares
Modify your Task2.java code so that 5 random squares get drawn. An example output is shown below. Note: You will not get the exact world since you didn’t pick the same random seed and implement your code in the exact way that I did.
Interactivity
In the latter part of the project, you’ll need to make your program interactive. Let’s see how we can modify the world in response to key presses.
Open and run GameLoopDemo. Note that when you press 1, 2, 3, 4, or 5, some of the tiles on the screen change. This is done using the
StdDraw.hasNextKeyTyped and StdDraw.nextKeyTyped methods.
StdDraw
As mentioned, we’ll be working with the library StdDraw. StdDraw is a provided library that gives basic capabilities to create drawings in your program as well as grab user input. Please take a look at the API before getting started as you will find some of the methods useful not only for this lab, but for Project 3.
Task 3A
Create Task3.java by copying Task2.java. Modify your code so that:
- Initially there is only a field of trees. That is, delete your five calls to
addRandomSquare. - When the user presses the
nkey, a new random square is called, i.e. each press ofncallsaddRandomSquare. - When the user presses the
qkey, the program ends.
You’ll need to look closely at GameLoopDemo. Importantly, your code should be stuck in an infinite loop, checking for key presses with each iteration.
Task 3B
Modify your code so that in the blank space that is left empty at the top of the window, we print out the number of squares that are currently being displayed. You can do this using StdDraw.textLeft(x, y, text), which draws the given text at the given x and y position. For example if we pick x = 1 and y = 17, the text will be drawn at the top left of the window. An example is shown below after pressing n 5 times. Note: You will not get the exact world since you didn’t pick the same random seed and implement your code in the exact way that I did.
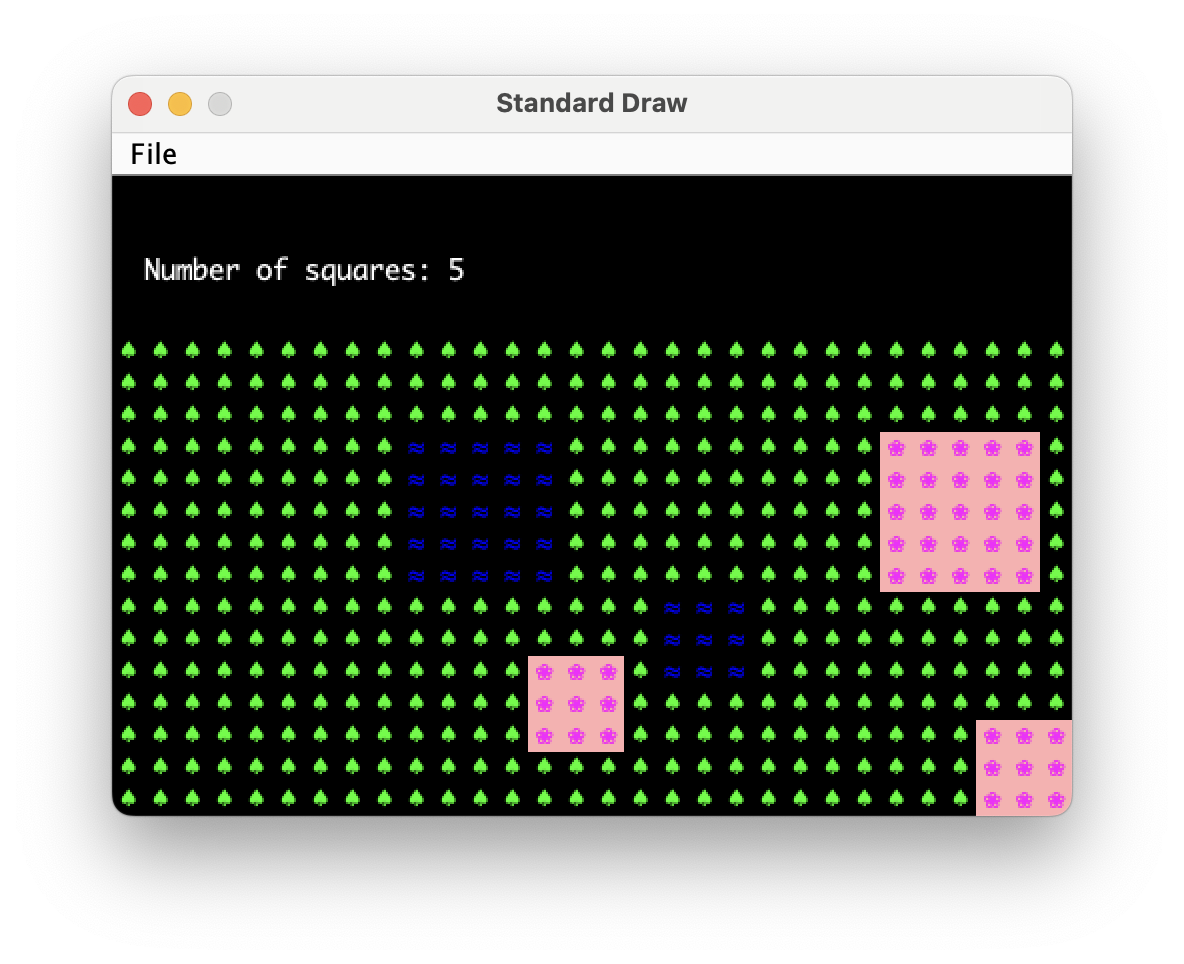
If the text is flickering, it’s because you’re redrawing too many times per second. You can add StdDraw.pause(2) to pause for 2 milliseconds at the end of each loop, which will pause after drawing everything to the screen for 2 milliseconds.
Task 4 (Optional, but recommended)
You’ll also need to implement a save and load feature in project 3. As an example that you can refer to later, let’s create a save and load feature for this lab.
Copy Task3.java to Task4.java.
Modify your program so that if the user presses s, the state of the world is saved. And if the user presses l, the state of the world is loaded. There are two things that make this challenging:
- The save should persist even if the user quits the program completely, turns off their computer, etc.
- The state of the world isn’t just the visible world, but also the state of the random number generator.
Example 1: If you start the program, press n 5 times, then press s, then q, the program will terminate completely. If you then reopen the program and press l, you should be exactly where you left off.
Example 2: If you start the program, press n 4 times, then press s, then press n, then press l, you should go back to having 4 rectangles, and importantly, if you press n again you should get the same pseudo-random 5th rectangle. So if you alternately press nlnlnlnlnlnlnl, you should keep seeing the same rectangle appearing and disappearing. The random state is effectively tracked and restored with each press of l.
To save state, we recommend writing a file that says how many times n has been pressed. For an example of how to read and write from a file, see ExampleSaveLoad.java.
Then when you load state, you should create a new random number generator (with the same starting seed), blank out the world completely, and call the addRandomSquare function n times. In effect, you’re replaying the sequence of key presses from the start.
There are other ways to do this, such as saving the random number generator object to a file and reloading it, but the simulating-from-scratch approach is much less error prone to implement, especially on the actual much larger project 3.
Task 5 (Optional, very challenging, similar to project)
As an extra challenge that will more closely resemble the project, add the ability to remove the most recently placed square using d.
Note: If you want the save feature to work properly, you’ll need to modify the save/load logic since it’s no longer enough to simply know how many squares have been created. That is, if your save file says the number 5, you don’t know if that means the user pressed nnnnn (i.e. n 5 times), or if they pressed nnnddnnnndn. One approach is to save the sequence of keypresses to the file.
Grading and Submission
This lab is worth 0 points. There is nothing to submit.